Vocabulist bookmarklet working in android browser

Vocabulist bookmarklet working in the default Android web browser

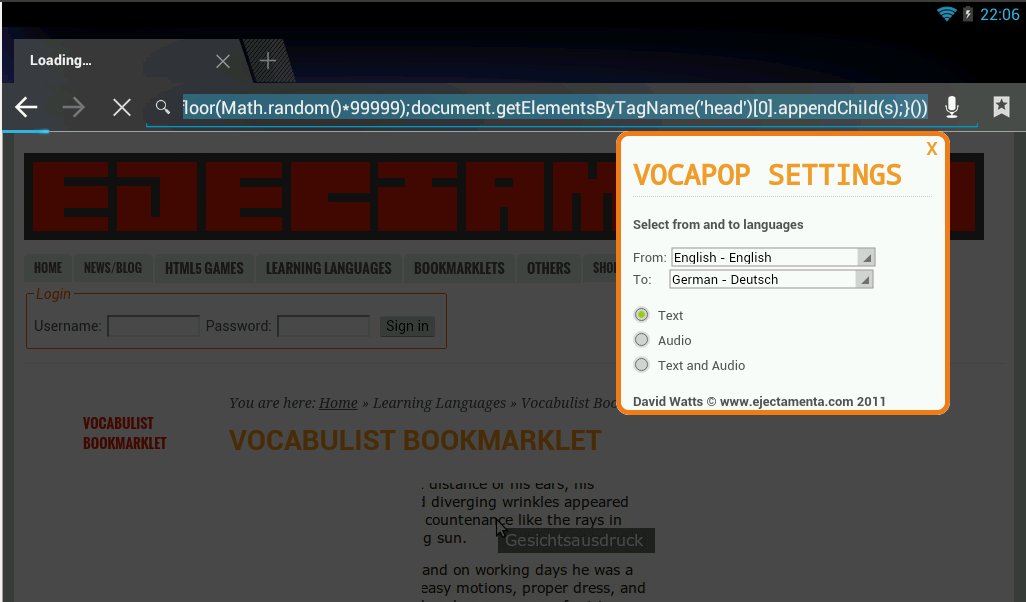
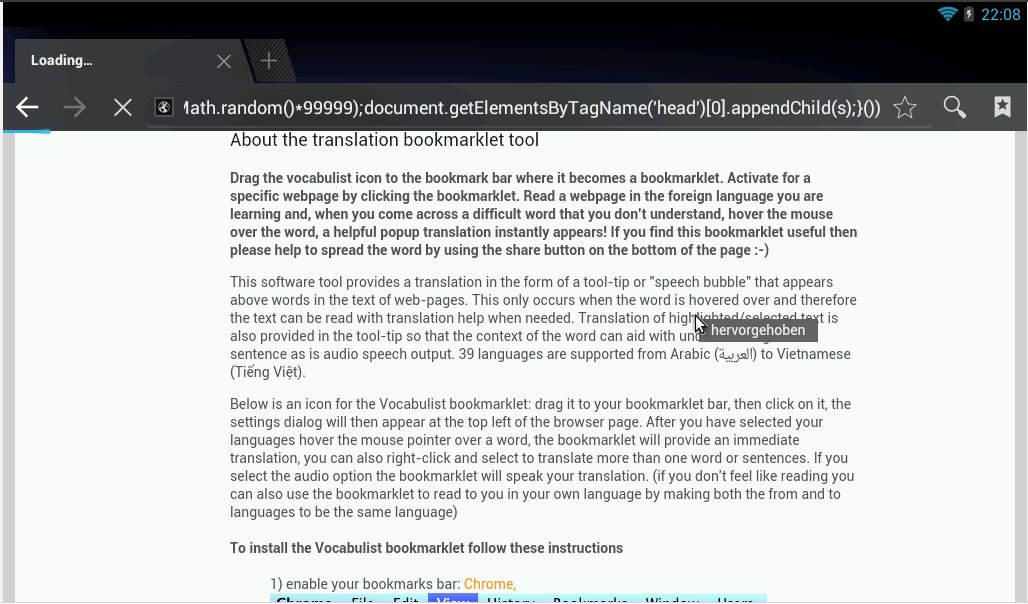
To install bookmarklets on an android device the best way to do this is using the browser sync function. So add the Vocabulist bookmarklet to your web browser on the desktop (chrome/firefox recommended) in the normal way. Then, in the case of chrome, when you log on to google with your username all your bookmarks along with any bookmarklets are available (still not sure how to make the bookmark bar appear though). Since there is no mouse hover on tablets and smartphones you have to click on the word to get the popup. Here are some example images

vocabulist language choosing dialog on android Vocabulist bookmark translation popup on Android

Online software for making a repeating pattern or texture

The ejectamenta texture maker software lets you create a repeating pattern from a single image. This is useful to create wallpaper or as a texture to be mapped to surfaces or just to create interesting patterns.

To create a repeating pattern the edges of the image have to be similar to each other, for instance the top edge should mirror the bottom edge and likewise for the left and right edges. The corners need to mirror all the other corners. We talk as the image to be repeated being the unit cell, in our case we are doing a 2D translation of the image to form the pattern.

You can design a pattern so that the pattern at the edges is continuous from bottom to top and the whole pattern then appears as a completely unified design. You can for instance leave the edge of the images blank and just have the design in the center of the unit cell, but this doesn’t make a very interesting pattern! It is better to draw parts of the design beyond the boundaries of the image and mapping these parts back to the unit cell (providing there is empty space at the other edge).

This software attempts to make a pattern from an arbitrary image by mixing or blending the pixel information at the edge of the images (you can choose how much of the edge is to be blended) from left to right and top to bottom. Its a simple algorithm that can only really work with semi-random textures, however it is still possible to create some interesting patterns. Once the texture image has been made it can be repeated in a grid pattern to see how good the texture looks. If you right click on the pattern you can save the image to disk.

Of course it is a pretty basic technique but useful for random textures. I will update it at a later date to use a wavelet pyramid technique and include it in the image processing application I am working on.

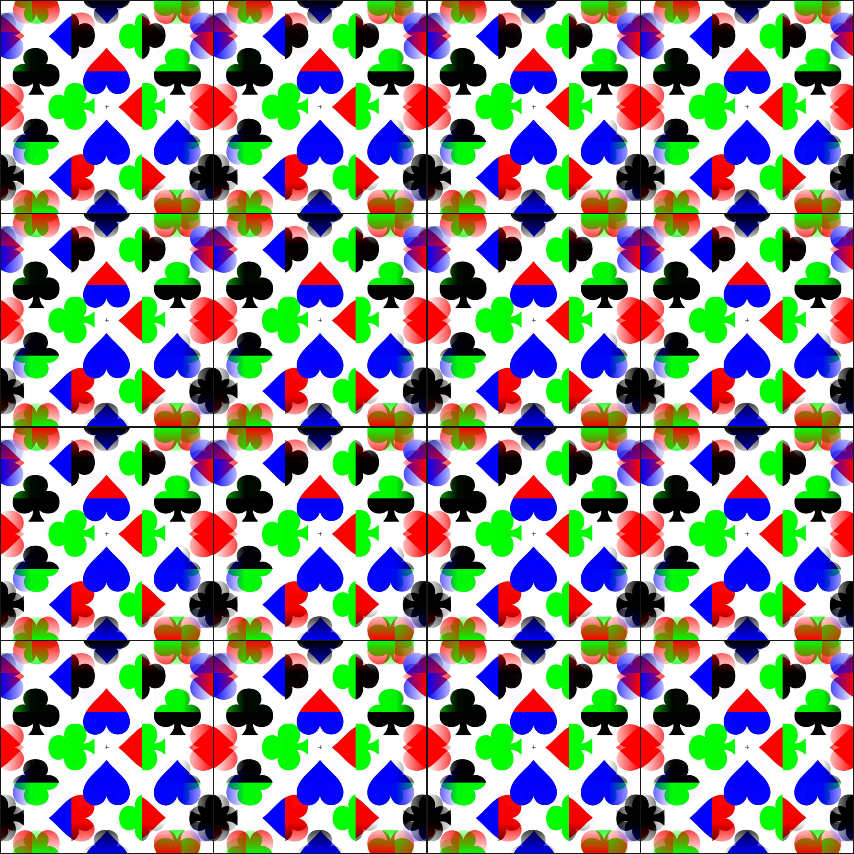
here is an example of an image and the repeated pattern it has been blended using 15% of the image edge.

befuddled image befuddled image
Original Image Repeating 4 by 4 pattern of the image

Understanding mortgages/loans

How mortgages or loans companies make money from you

The reason for this article is that in the past (whilst living in the UK) I have moved location and bought another house somewhere else like many people do. The mortgage company or bank said that they must cancel the mortgage and take out a new mortgage on the new house. It surprised me how little money I received back from the bank for the old mortgage for all those months that I had paid X hundreds of pounds paying back the mortgage (excluding the additional penalties for early termination!). So this article is going to look at the mortgage payments and give a few plots to illustrate what happens with your money.

In our mortgage example we are going to borrow 140,000 pounds at an interest of 6.5% annually for a term lasting 30 years. The main calculation will be how much of the principal (amount borrowed is paid back every month). For this we will use the annuity formula, where `r` is the monthly interest rate expressed as a decimal (`r`=yearly_rate/12/100), `P` is the principal or the amount borrowed and `N` the number of months in the full term.

`c=(r*P)/((1-(1+r)^-N))`

Using this formula we can calculate our monthly payment (c=885 pounds). The other formula we need is for the debt schedule which tells us how much of the principal gets paid off every month which we will term `p`.

`p=((1+r)*P’)-c`

Where `P’` is the previous months outstanding amount (`p`) which at the beginning of the term will be equal to `P` (More information on the formulas used can be found here).

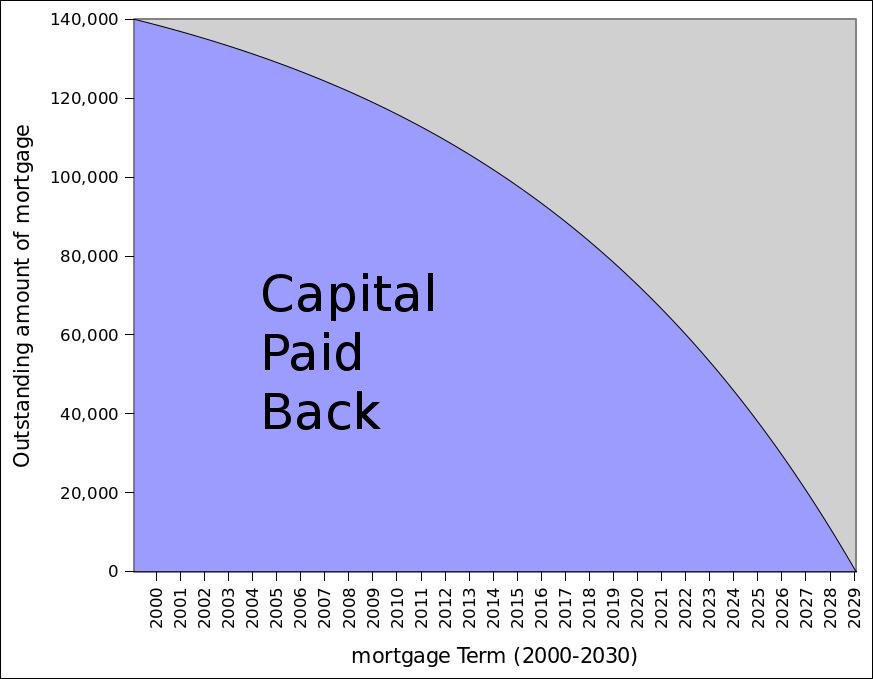
I have generated a few plots from the formulas given above to try to demonstrate what happens to your money when you pay back a mortgage or loan. For example the plot of `p` vs `N` below shows a typical repayment curve for the borrowed money

capital outstanding
How the capital amount owed decreases with time

You can see in this figure that the amount of the capital that you pay back in the beginning years is not much with most of the money being spent paying back the interest. This means that if you move early on in the term you wont get much money back from the mortgage, therefore it is better if possible to hang in there until the full term has ended.

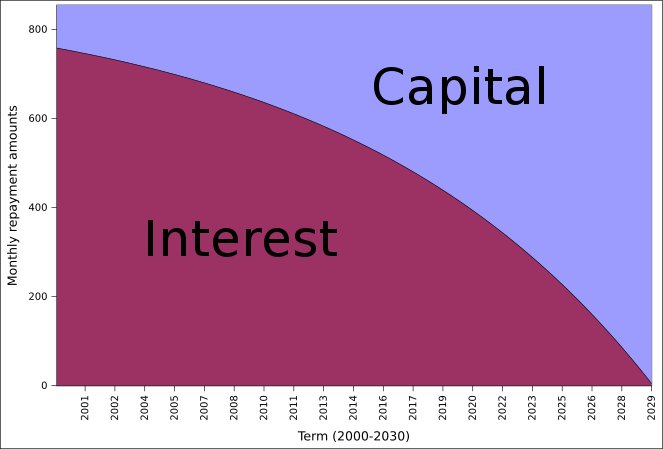
The next figure shows the proportions of the monthly mortgage payment split between capital and interest payments as the mortgage progresses. It actually takes 19 years 4 months before capital payments are greater than the interest payments in a 30 year mortgage.

monthly repayment fractions
Proportions of monthly mortgage payment that goes towards paying capital vs interest payments

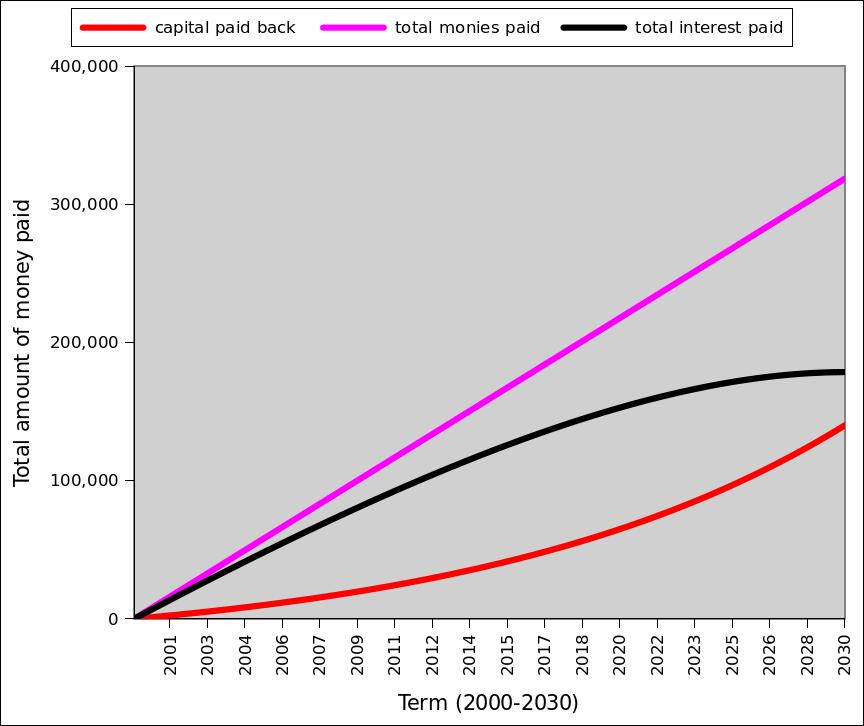
The final figure shows just how much extra money is made from lending the money and which proportion of this is interest or capital repayment. You actually pay more money towards interest than you do towards capital and the total money spent during the mortgage term is more than double the money borrowed.

total amount of money paid
Total Amount of money paid during lifetime of mortgage

Thank you Wikkipedia, Gnumeric and MathJax

My Nikon DSLR slide/negative copying setup

I have a nikon D300 that I want to use as a slide/film copier, I did buy a set of novoflex bellows for this purpose but its quite fussy on the lenses it accepts, i could only get it to fit a Series E 50mm or a Soligor 60-300mm macro (which happens to be a cool lens BTW).

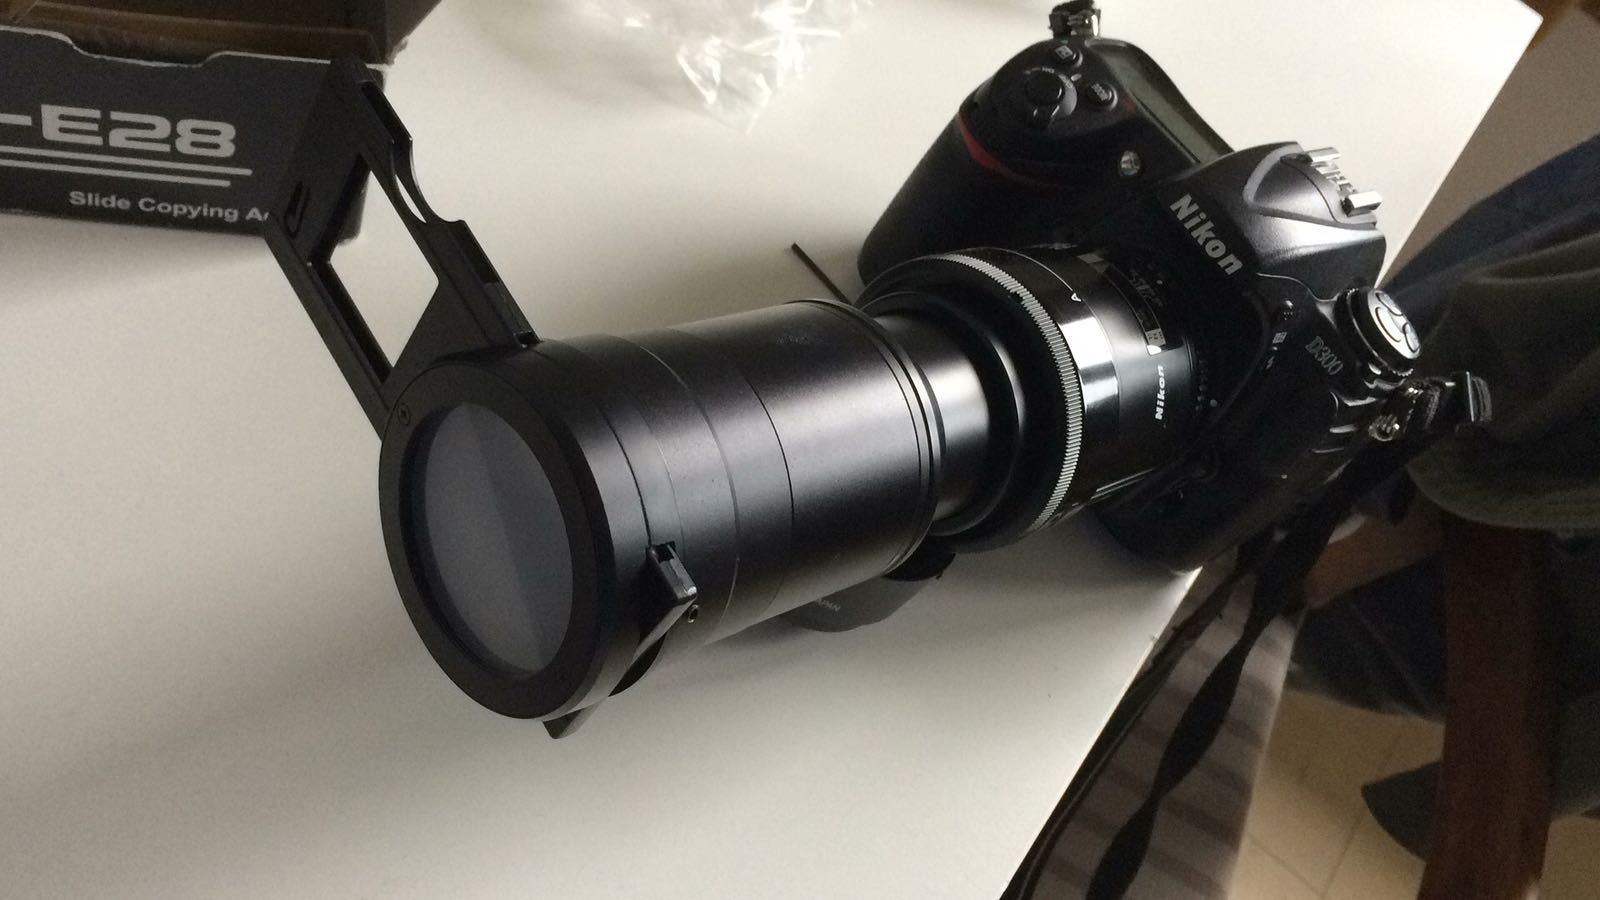
For my copier I am using a Nikon 55mm f/2.8 AF MICRO-NIKKOR lens with a 62mm filter thread. For the slide copying attachment I found a ES-E28 side copying part that was originally make for a Nikon Coolpix camera. it has quite a number of nice accesories like a film and a slide holder, it ia also well made with a good quality diffusor glass. The slide copier head can be taken apart by removing the grub screws, you remove the Coolpix attachment part and just use the head section.

To adapt the ES-E28 to the nikon camera I used a Filter-Adapter 62mm for a Nikon CoolPix L840, part number LA-62L840T. The larger end of this part fitted the E28 section quite well and could be attached using the grub screws. On the other end of this adapter is a female 62mm thread so then I just needed a 62mm to 62mm adpater ring to attaach it to my macro lens (other apater rings can be bought for other lens sizes). The filter adapter consists of two parts, on part that attaches to the ES-E28 and a 38mm long (excluding threads) tube with 62mm female-male threads on it. This tube can be replaced by a longer or shorter one to adjust the focal distance for different lenses. You can also source one with male-male threads and do away with the adapter ring (if you happen to have a 55 F/2.8 AF lens like me, otherwise you still need an adapter to fit whatever size of filter thread the lens you are using has).

All the components described in this article when used with a APS format DSLR perfectly spaces a slide from the lens so that it fills the image frame. If you have a different focal length lens or different sensor size (FX) then you will need to source an appropriate 62mm spacer tube (eg longer for longer focal length on DX). For example If you have the 40mm Micro lens on a DX then the Filter adapter is probably too long and the image of the slide will not fully fit the frame, in this case you will need a shorter 62mm tube, (I think probably a 20mm length tube would be about right giving the working distance of 35mm from lens to subject). On my setup the slide distance is 75mm from the front of the lens. KenRockwell says that the working distance is 55mm from the front of the lens so maybe then the slide is a actually a bit smaller than the frame (but as it is now it is leaves a bit of room for error and still has plenty of pixels).

Some comments on taking the pictures:

Use manual focus, with auto focus the lens will hunt and with this extra weight on the end that is not good for the camera. Use live view and zoom to manually focus on the slide/negative (you would probably be better off with the manual focus AI 55mm lens insead of the AF version I have). Set the camera to manual settings, adjust the aperature to a smallish f-stop, like f-8, this gives the sharpest images. In live view mode you can also see the exposure meter, adjust the shutter speed so that the meter reads 0, neither dark or light. For each slide/negative you do you will can adjust this to compensate for poor exposure in the orginal image, or just leave it as it is. You will probably find you dont have to refocus (if you are gentle changing the slides/negatives), but results will be better if you do.

I ran though about 100 slides in about an hour, its pretty quick, the slowest part is replacing the slides in the changer (you also have to watch that they are aligned horizontally when inserted into the tube).

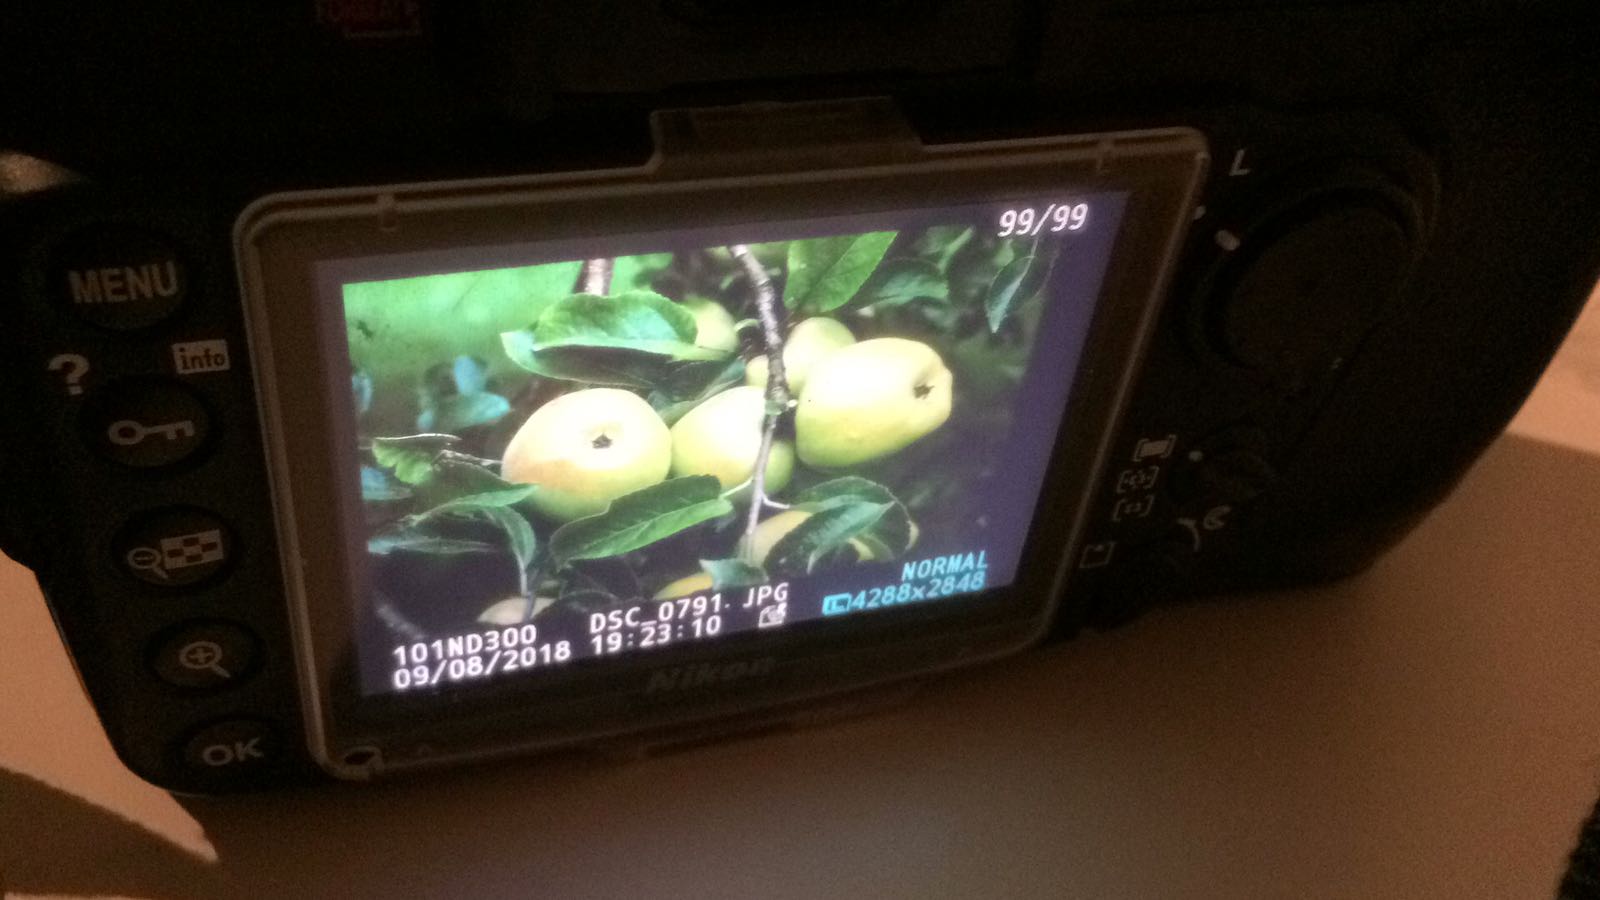
Here are some images of the setup taking a picture of a slide with an image of some apples on it.

image showing nikon DX slide scanningimage of slide shown in D300 camera display

Update

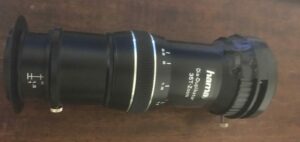
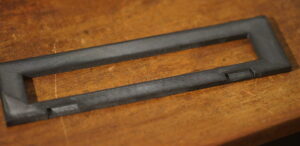
I now use a Hama Dia Duplikator 35T-Zoom to scan my analogue films. It is a better solution than the Coolpix copier mentioned above. This time I am using it with a full-frame Sony Camera. For this Duplikator I have designed for 3D printing a film holder that works quite well. It can be found here .

HAMA Dia Duplikator
HAMA Dia Duplikator
negative copying frame

mplayer bbc radio script

I modified a mplayer linux script to play all bbc radio stations. It can be found here . If you call it without a number then it will output the station and its number, otherwise call it like this

bbcradio 3

for radio 3

Responsive social sharing toolbar

The social tool bar featured on this site came from this excellent blog post. I really liked the social bar so I added it to the ejectamenta site. I have created some files to make it easy to install (click the links to download) responsive-share-bar.js and responsive-share-bar.css , and some 32×32 pixel image icons shareicons.zip. Save these files somewhere on your webserver and remember the path. Add this code in the head section of you

<link rel="stylesheet" type="text/css" href="http://www.yourwebsitename.com/path/to/file/responsive-share-bar.css"/>

Then add the reference to the javascript file just before the tag.

<script async type="text/javascript" src=""http://www.yourwebsitename.com/path/to/file/responsive-share-bar.js"></script>

Then copy the following html code to the body section of your webpage

<div id="share-wrapper">
    <ul class="share-inner-wrp">
        <!-- Facebook -->
        <li class="facebook button-wrap"><a href="#">Facebook</a></li>
        
        <!-- Twitter -->
        <li class="twitter button-wrap"><a href="#">Tweet</a></li>
        
        <!-- linkedin -->
		<li class="linkedin button-wrap"><a href="#">Linkedin</a></li>
        
        <!-- reddit -->
		<li class="reddit button-wrap"><a href="#">Reddit</a></li>
   
        <!-- Digg -->
        <li class="digg button-wrap"><a href="#">Digg it</a></li>
        
        <!-- Stumbleupon -->
        <li class="stumbleupon button-wrap"><a href="#">Stumbleupon</a></li>
      
         <!-- Delicious -->
        <li class="delicious button-wrap"><a href="#">Delicious</a></li>
        
        <!-- Google -->
        <li class="google button-wrap"><a href="#">Google+</a></li>
        
        <!-- Email -->
        <li class="email button-wrap"><a href="#">Email</a></li>
    </ul>
</div>

For the linkedin summary field I get this from the meta-description tag on the page, so your page should have something like the following on it. If it is longer than 256 chars, linkedin say that they will truncate the string and use ellipses.

<meta name='description' content='How to install a responsive toolbar for your website that works well on desktop and mobile websites'>

That’s it, you should now have a good looking, slide out, and responsive social toolbar for your website, just like you see on the left of this page, please share if you like my site.

All The code was webpage formatted using the CodeToHTML converter

how to use pdf.js to display pdf documents

pdf.js is a great cross platform pdf viewer solution, here I explain how to use it

Install PDF.js viewer on your server

Instructions 1 to 7 are to install node as a webserver for the PDFViewer, they not necessary if you are already running a webserver (i.e. Apache).

1) install git

sudo yum install git

2) make or use a pdf.js install directory on your server

mkdir libs/ cd libs

3) Now you have a server directory /home/user/public_html/libs, for example. Clone the git project into this directory

git clone git://github.com/mozilla/pdf.js.git pdfjs

4) there will be a new directory created called pdfjs which is the project directory, cd into this directory. Then we have to install the node server

sudo yum install nodejs

5) then run the server (in the background so we can carry on), to do this robustly I am using forever its runs the server in the background robustly, to install this we first have to install the node package manager (npm) then use npm to install forever

sudo yum install npm;
sudo npm install forever --global

6) then we can start the pdf server

forever start make.js server

7) you can check that it is running with

forever list

8) then we can display the pdf with the following html code

<iframe style="width:100%;height:500px" src="https://www.mydomain.com/libs/pdfjs/web/viewer.html?file=http://www.mydomain.com/mypdf.pdf"></iframe>

You now have a nice pdf viewer for your website guests that doesn’t depend on any plugins.

You can see the finished pdfs on the bottom of these webpages image analysis of crystals and steerable filters for detecting crystals

Using PDF.js as a fallback for native pdf viewer plugin

PDF.js is at the moment a bit buggy, (ie. printing support is not available – hopefully this will change in the future!).

In order to provide the best experience for all users we shall: use the native pdf viewer plugin (i.e. adobe) and if not available use pdf.js as a fallback.

9) Download pdfobject.min.js from the pdfobject Github site , save to lib directory

10) Add the following code to the header region of your webpage (change the width, height in the style to suit)

<script>
var pdf_url="http://www.mydomain.com/mypdf.pdf";

  window.onload = function (){
        var myPDF = new PDFObject({ url: pdf_url }).embed("pdfdoc")

if(!myPDF){
document.getElementById('pdfdoc').innerHTML += '<iframe style="width:100%;height:500px" src="https://www.mydomain.com/libs/pdfjs/web/viewer.html?file='+pdf_url+'"></iframe>';
}
      };

11) Then in the body section of your html page replace the iframe html code (from section 8) with the following html code

<div id="pdfdoc" style="width:100%;height:500px"></div>

then you are good to go!

* Code conversion to HTML friendly display format was done using the Code2HTML converter

Article on how to develop a browser extension for Mozilla Firefox using the Firefox addon API and CFX tool

Getting started building an extension with the Firefox CFX program

Introduction to browser extensions

Browser extensions are programs that run on a browser for instance Firefox and interact with the content of web pages. Firefox provides an addon SDK and the CFX command line tool for developing extensions which we will discuss later. An extension generally consists of the 3 main source files.

  • Addon File: This JavaScript file (main.js) controls communication between the other files and allows interaction with the functionality of the addon API.
  • Panel File: This file displays a form to the user to input information or settings it is typically displayed by clicking an icon in the browser toolbar, JavaScript handles getting/setting data from the controls and relaying this data to the addon file.
  • Background or Content Script File: This runs in the context of the webpage that a user is browsing and allows the extension to read and write to the webpage and change the browsing experience for the user. For instance the content scipt file could analyse website page structure and provide SEO feedback to the user.

There is also a JSON file called package.json that defines the extension settings.

The extension that will be developed

The extension that we will develop is called jspanel. It consists of a addon file that controls the addon logic (main.js) and a background or content script file (content.js). The extension will also have a popup panel (panel.js and panel.html) in which you enter some javascript code to run in the content of the web page. The content file attaches this code to the webpage when a the panel’s ‘Run Code’ button is clicked. The script will saved to persistant storage using addon SDK functionality. Messages will be passed between the addon and the panel and the addon and the content script. The extension uses the Page Worker method, so that the extension code it will automatically run for each opened browser tab although the running of the content script code is controlled by clicking a button on the panel.

Downloading and installing the addon SDK and the CFX tool

The addon SDK can be obtained from the Mozilla website. You will also need python to run the SDK tools, this can be easily installed using by doing

apt-get install python2.7

on Linux. On Windows you can download either just install Python or Anaconda, a complete Scientific Python development environment. In Windows to run python on the command line in different directories you will have to add the path to the Python executable in the PATH option of the environment-settings dialog. Download and extract the compressed SDK file and cd to the new folder. The SDK can started by running the command source bin/activate. However you probably don’t want to always have to navigate to this directory to run the command, I set up an alias to run the SDK from any directory

alias addon='cd ~/Downloads/addon-sdk-1.17/;source bin/activate;cfx;cd -'

After running this command the command prompt changes to include (addon-sdk-1.17) and you have access to the CFX tool. With the CFX tool you can create a new bare project in an empty directory by running cfx init and load and run the extension in the browser by running the command cfx run in the extension directory. The cfx xpi command is used to generate the installable .xpi file from the extension folder.

The cfx init command produces an empty project, if you run the empty project with cfx run you won’t be able to see icons or panels to interact with, however it does provide a package.json which you can modify with information on your extension. You can also add extra fields to the json file, for instance if you need to make cross domain calls you can add a ‘permissions’ setting.

permissions": { "cross-domain-content": ["http://www.CrossDomainURL1.com/*", "http://www.CrossDomainURL2.com/*"]}

Example extensions can be found in the addon directory and demonstrate more functionality, for instance, if you cfx run in the ‘addon-sdk-1.17/examples/reddit-panel’ directory you will see that the reddit-panel extension has an icon on the browser bar and that if you click it a panel pops up pre-populated with reddit posts.

Debugging Extensions with Firefox Nightly

It’s only possible to debug extensions in Firefox versions later than 37, on Linux it is likely that you have an older version of the browser (I am on v36) so I installed Firefox Nightly for debugging purposes. It’s also able to debug HTML5 elements such as Canvas and WebAudio as well as experimental support for multi-threading so it’s well worth installing. Update: Now my Linux PC is on Firefox v37 and can debug extensions, the browser is much more stable than nightly so I recommend sticking with the normal install. You can install the browser using the following commands

sudo add-apt-repository ppa:ubuntu-mozilla-daily/ppa; 
sudo apt-get update;
sudo apt-get install firefox-trunk;

Once its installed you’ll want to setup a profile so that the browser will remember your settings between restarts, for instance you can always start on the same web page that you use for testing. This can be done by running the command

firefox-trunk -P night

A dialog pops up and you can create a new profile (called for instance night). To start up Firefox using the profile you need the path of the profile directory. On my Linux computer it was found at ~/.mozilla/firefox-trunk/6z43qrwk.night/. I also create an alias to run the extension using firefox nightly under the profile directory and save the alias statment by adding to the ~/.bashrc file.

alias nightly='cfx run --binary=/usr/bin/firefox-trunk --profiledir ~/.mozilla/firefox-trunk/6z43qrwk.night/'

Now when Firefox nightly is run in the extension directory it starts up with the same settings as before and now allows you to debug your extension. You can start the debugger by clicking the Tools->Web Developer->Browser Toolbox menu item. In Windows its easier to go to the about:addons page (extensions tab) and click on the debug button of your extension (this way probably works for Linux too). A dialog pops up which states:

An incoming request to permit remote debugging connection was detected. A remote client can take complete control over your browser!

Client Endpoint: 127.0.0.1:57362
Server Endpoint: 127.0.0.1:6080

Allow connection?

When you click YES you will see the debugger window. The window contains a console window where you can see any coding errors and most importantly a debugger tab, on the left hand side there is a sources tab visible. There are a lot of files listed most of which are the Firefox SDK files, however if you look carefully you will be able to find the extension source code files which are normally somewhere towards the top of the list (under the path resources/your-extension-name). When you click on your source file you can click to the left of the line number and set a breakpoint on which execution will halt. The following image shows debugging of the reddit-panel extension with the debugger stopped at line number 23 and a variable value being watched in a popup.
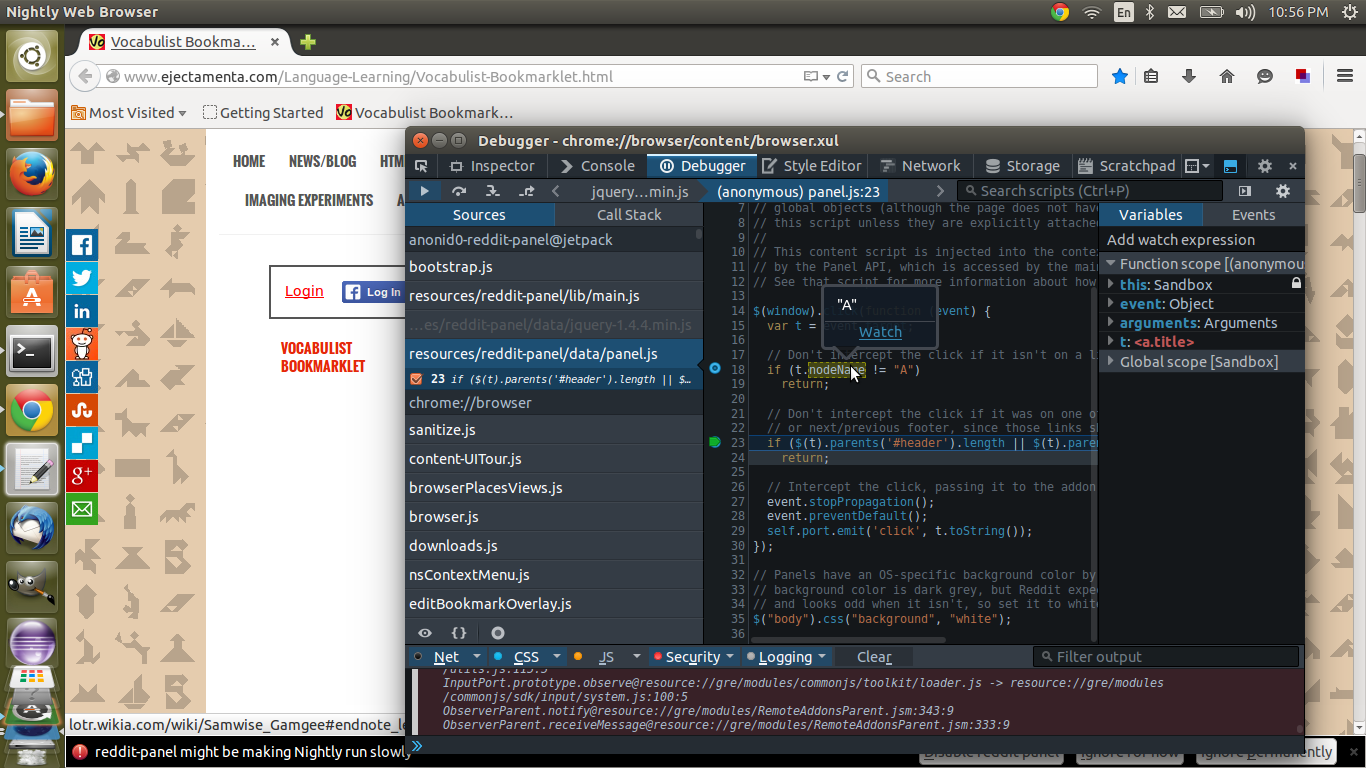
debugging the reddit panel extension in firefox nightly

Coding the extension

The package.json file

First we will create a new directory with the name of your extension (I called it jspanel) and run cfx init in it. You can open up the package.json file in the root folder with text editor and personalise the extension by changing some of the settings for instance like author and description. Here is the altered package.json file for the extension.


{
  "name": "jspanel",
  "title": "jspanel",
  "id": "jid1-gBrsZGUZBimfBw",
  "description": "Run any code in the context of a webpage",
  "author": "ejectamenta",
  "license": "MPL 2.0",
  "version": "0.1"
}

The panel html code (panel.html)

Our html file contains a textarea html5 editbox and a button that runs our code.


<title>Enter javascript in the edit box</title>
</head>
<body>
<textarea cols="25" rows="7" id="code" style="width:100%"></textarea>
<button id="run">Run Javascript</button>
 </body>

The panel JavaScript code (panel.js)

The panel JavaScript file handles the html control events, the code is run when the dialog ShowDlg event is sent from the addon, just before the panel is shown. The document.getElementById('run').onclick function is called when the ‘Run Code’ button is clicked, it sends a ‘Run’ message to the addon (main.js) using the self.port.emit method along with the script (from the text edit box) that we want to run on the web page. The user’s JavaScript code will will be serialised to storage so that edited code is not lost between sessions, this is handled by sending a message to the addon when a keyup event happens in the edit box (only the addon code is allowed access to the addon SDK storage class).

<span style="color: green;">/*
	Get the source code text from storage via the addon add to textarea control
*/</span>
self.port.on("load-script", function(val) {
	document.getElementById('code').value = val;
});

<span style="color: green;">/*
	On Run button click send the script text to the addon
*/</span>
self.port.on("showDlg", function(val) {		<span style="color: green;">/* called when popup shown */</span>
 
 	<span style="color: green;">/* on button click handler */</span>
	document.getElementById('run').onclick = function(){
		var script = document.getElementById('code').value;
		self.port.emit("Run", script);
	}; 
	
	<span style="color: green;">/* update storage when script text changes */</span>
	document.getElementById('code').onkeyup = function(){
		self.port.emit("store-script", this.value);
	}; 
});

The addon code (main.js)

When building the addon we can choose whether to have page workers for every newly opened page or just for the active page. The first example creates workers for every new tab using a page mod object. The second example source code uses the tabs class to add a worker to the active tab only when the ‘Run Code’ button is clicked

The page-mod class – workers for every page

The file main.js is located in the lib directory and contains the main extension logic, it will create the class to handle the panel and the content script and also act as an intermediate for the passing of messages between the panel and the addon script. The worker array contains workers for each of the opened web pages (i.e. each tab). Workers are attached and detached when pages are loaded or closed.

We have a toggle button with a set of icons (these can be found in the zip file). The onChange function of the toggle button shows our panel with the position of button meaning that it is shown next to the extension button.

Our panel class object uses the contentURL property to define the html file and the contentScriptFile property to define the JavaScript file for the panel. To specify a CSS file for the panel the contentStyleFile property can be used in exactly the same way as the contentScriptFile property. The handleHide function closes the panel and panel.on("show") function allows use to do something before the panel is shown. In our case we read the script text from storage then call panel.port.emit("showDlg").

The pageMod class object loads up jquery and our content script file and runs the contentScript when ‘ready’. The ‘*’ in the include: ['*'] parameter specifies that the worker will run on any domain, this can be changed to specific domains in which case the worker will only load on those domains. The ‘Run’ command from the panel is received in the panel.port.on("Run") event function, we then send a message to the content script that includes the script text using the worker.port.emit('Run') call. On getting the panel.port.on("load-script") call from the panel we save the code text to storage.

/* content script reference allows modification to webpage content */
var pageMods = require("sdk/page-mod");
/* used to load files */
var data = require("sdk/self").data;
/* local storage class */
var ss = require('sdk/simple-storage');

var workerarray = [];

/* worker for each open tab */
function detachWorker(worker, workerArray) {
  var index = workerArray.indexOf(worker);
  if(index != -1) {
    workerArray.splice(index, 1);
  }
}

exports.main = function() {

	/* toggle button reference */
	var { ToggleButton } = require('sdk/ui/button/toggle');

	/* panel class */
	var panel = require("sdk/panel").Panel({
		height: 330,
		contentURL: data.url("panel.html"),
		contentScriptFile: data.url("panel.js"),
		onHide: handleHide
	});
	
	/* Create a button */
	var button = ToggleButton({
	  id: "show-settings",
	  label: "Vocabulist Settings",
	  icon: {
		"16": "./icon-16.png",
		"32": "./icon-32.png",
		"64": "./icon-64.png"
	  },
	  onChange: handleChange
	});

	/* Show the panel when the user clicks the button. */
	function handleChange(state) {
	  if (state.checked) {
		panel.show({
		  position: button
		});
	  }
	}
	
	/* hide panel */
	function handleHide() {
		/* hide the popup panel */
	  	button.state('window', {checked: false});
	}

	/* function called when panel showed */
	panel.on("show", function() {
		/* read from storage set control settings */
		if(ss.storage["script-source"] !== undefined)
			panel.port.emit("load-script", ss.storage["script-source"])	/* send data to panel */
 		
		/* show the popup panel */
		panel.port.emit("showDlg");
	});

	var pageMod = pageMods.PageMod({
		include: ['*'],
		contentScriptWhen: 'ready',
		contentScriptFile: 
		[data.url("jquery.min.js"),	data.url("content.js")],
		onAttach: function(worker) {
		
			/* add tab to array of workers */
			workerarray.push(worker);
			
			worker.on('detach', function () {
				detachWorker(this, workerarray);
			});
			
			/* 
			you can use worker.port.on to receive messages from 
			content script in a similar way to panel.port.on 
			*/
			
			panel.port.on("Run", function(val) {
			  	worker.port.emit('Run', val);
			});
			
			panel.port.on("store-script", function(val) {
				ss.storage["script-source"]=val;	
			});
		}
	});
}
The tabs class – a worker for the active tab

If we don’t want our code to run on every tab then we can make use of the tabs class. When the ‘Run’ function is called a new worker is created from the currently active tab and attaches the specified content scripts to the source code of only that tab. The following code can be used alternatively to the main.js and is included in the panel-tab zip file and the project available in the firefox addons gallery.


/* content script reference allows modification to webpage content */
var tabs = require("sdk/tabs");
var self = require("sdk/self");

/* used to load files */
var data = self.data;
/* local storage class */
var ss = require('sdk/simple-storage');

var _jquery = false;

exports.main = function() {

	/* toggle button reference */
	var { ToggleButton } = require('sdk/ui/button/toggle');

	/* panel class */
	var panel = require("sdk/panel").Panel({
		height: 330,
		contentURL: data.url("panel.html"),
		contentScriptFile: data.url("panel.js"),
		contentScriptWhen: "start",
		onHide: handleHide
	});
	
	/* Create a button */
	var button = ToggleButton({
	  id: "show-settings",
	  label: "Vocabulist Settings",
	  icon: {
		"16": "./icon-16.png",
		"32": "./icon-32.png",
		"64": "./icon-64.png"
	  },
	  onChange: handleChange
	});

	/* Show the panel when the user clicks the button. */
	function handleChange(state) {
	  if (state.checked) {
		panel.show({
		  position: button
		});
	  }
	}
	
	/* hide panel */
	function handleHide() {
		/* hide the popup panel */
	  	button.state('window', {checked: false});
	}

	/* function called when panel showed */
	panel.on("show", function() {
		/* read from storage set control settings */
		if(ss.storage["script-source"] !== undefined)
			panel.port.emit("load-script", ss.storage["script-source"]);	/* send data to panel */
		
		/* show the popup panel */
		panel.port.emit("showDlg");
	});
	
	/* save script to storage */
	panel.port.on("store-script", function(val) {
		ss.storage["script-source"]=val;	
	});
	
	/* attach script when Run Code clicked */
	panel.port.on("Run", function(val) {
		var worker = tabs.activeTab.attach({contentScriptFile: [self.data.url("jquery.min.js"), self.data.url("content.js")]});
		
		worker.port.emit('Run', val);
	});	
};

The content script code (content.js)

The content script file is simple and just handles the worker.port.emit('Run') command from the addon in the self.port.on("Run") function. JQuery is used to add the code script to the html document body of the browser DOM.

self.port.on("Run", function(val) {
	/* attach source to content page */
	$( val ).appendTo( "body" );
});

Running the extension

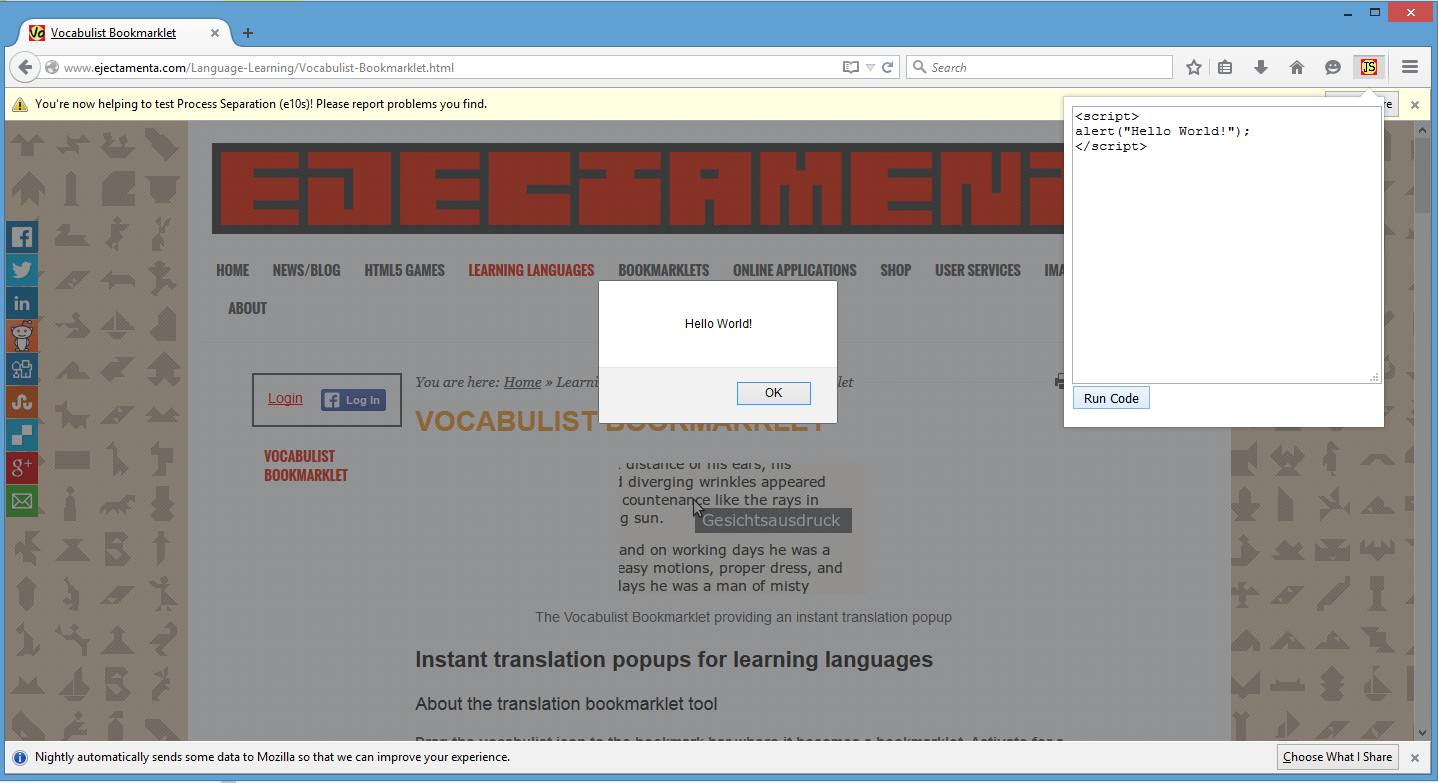
In the panel the following javascript code is added wrapped in the html script tags (html code can also be included in the editbox). The code is run using cfx run in the extension directory.

<script>
alert("Hello World!");
</script>

Here is an example of the jspanel extension running in Firefox Nightly on Windows, it shows the result of clicking on the ‘Run Code’ button. The jspanel extension that we developed running in Firefox browser
The complete source for the page mod project can be downloaded here and for the tabs project here. To run this code as an extension just rename the zip file giving it a xpi file extension (jspanel.xpi). This also means that you can rename any extension .xpi file to .zip and extract and read the extension’s source code.

Please link to this web page if you find the tutorial useful.

The html and JavaScript code has been formatted for the webpage using the Code2HTML online code to web page formatting tool.
A modern responsive CMSMS theme available for free download

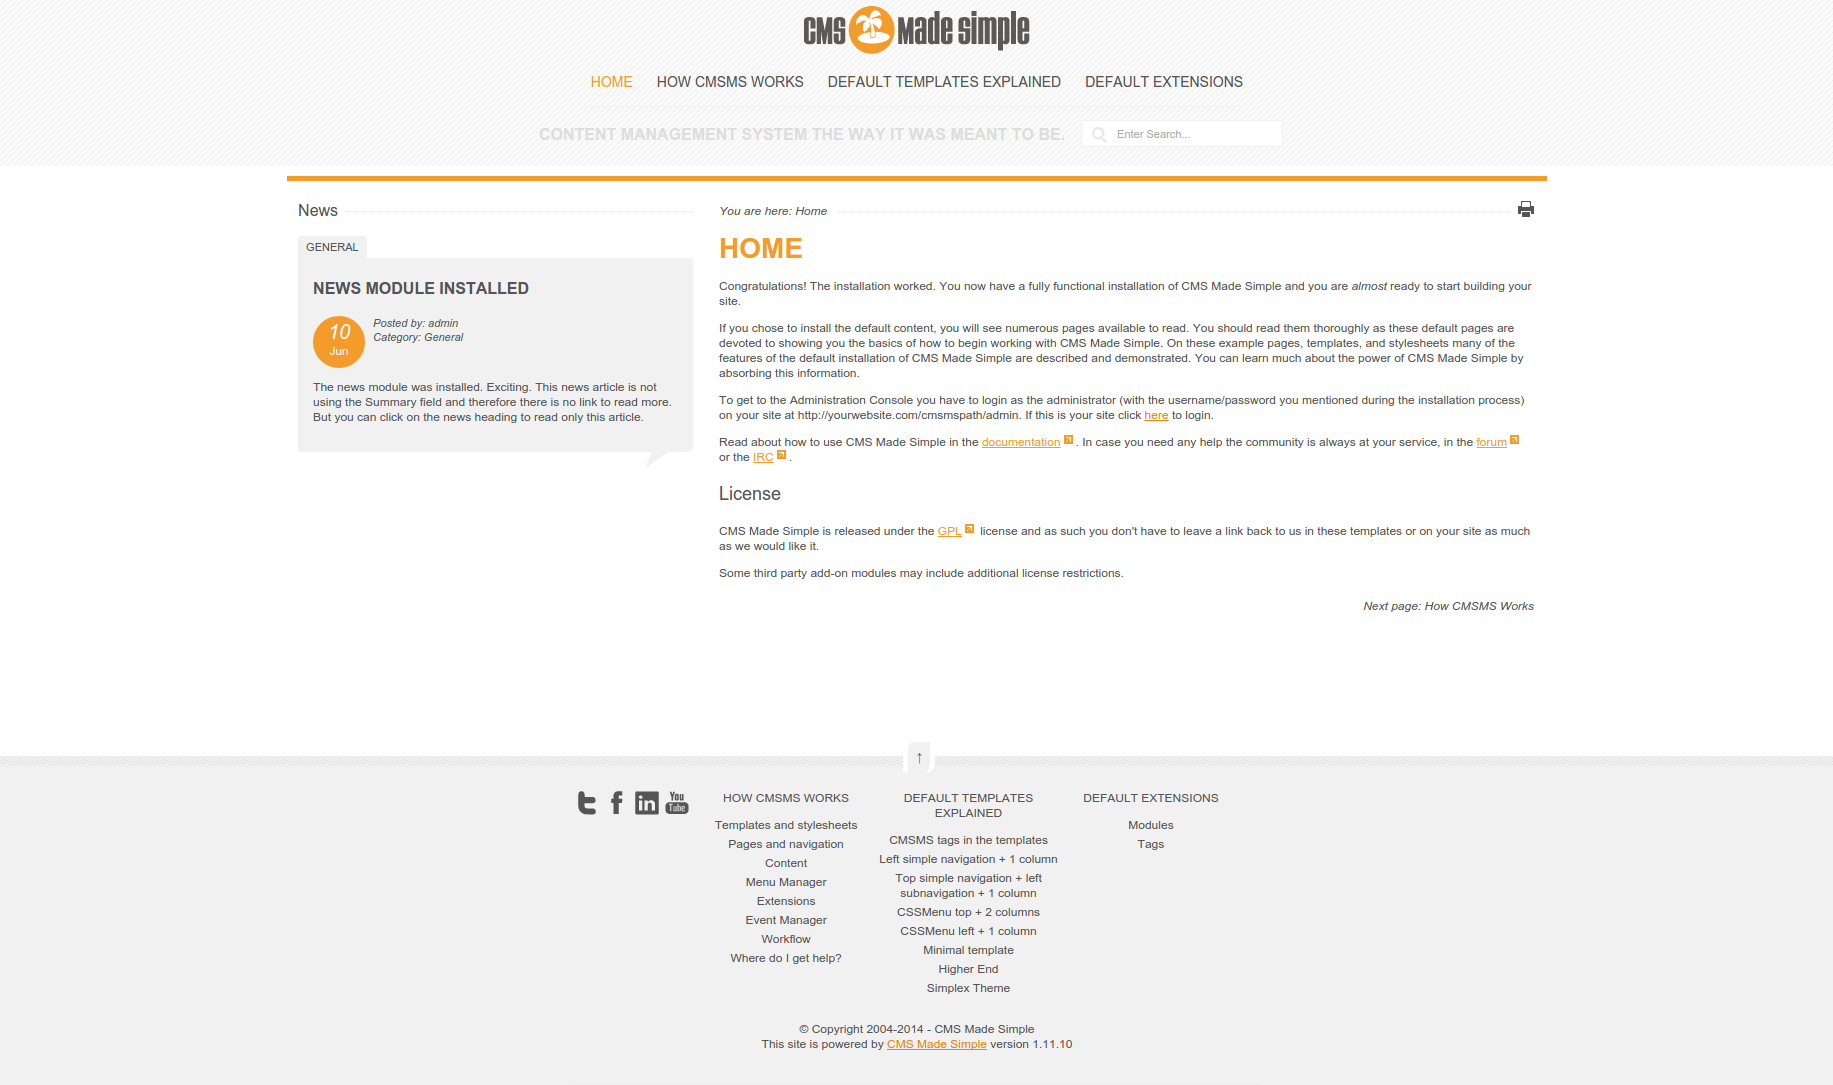
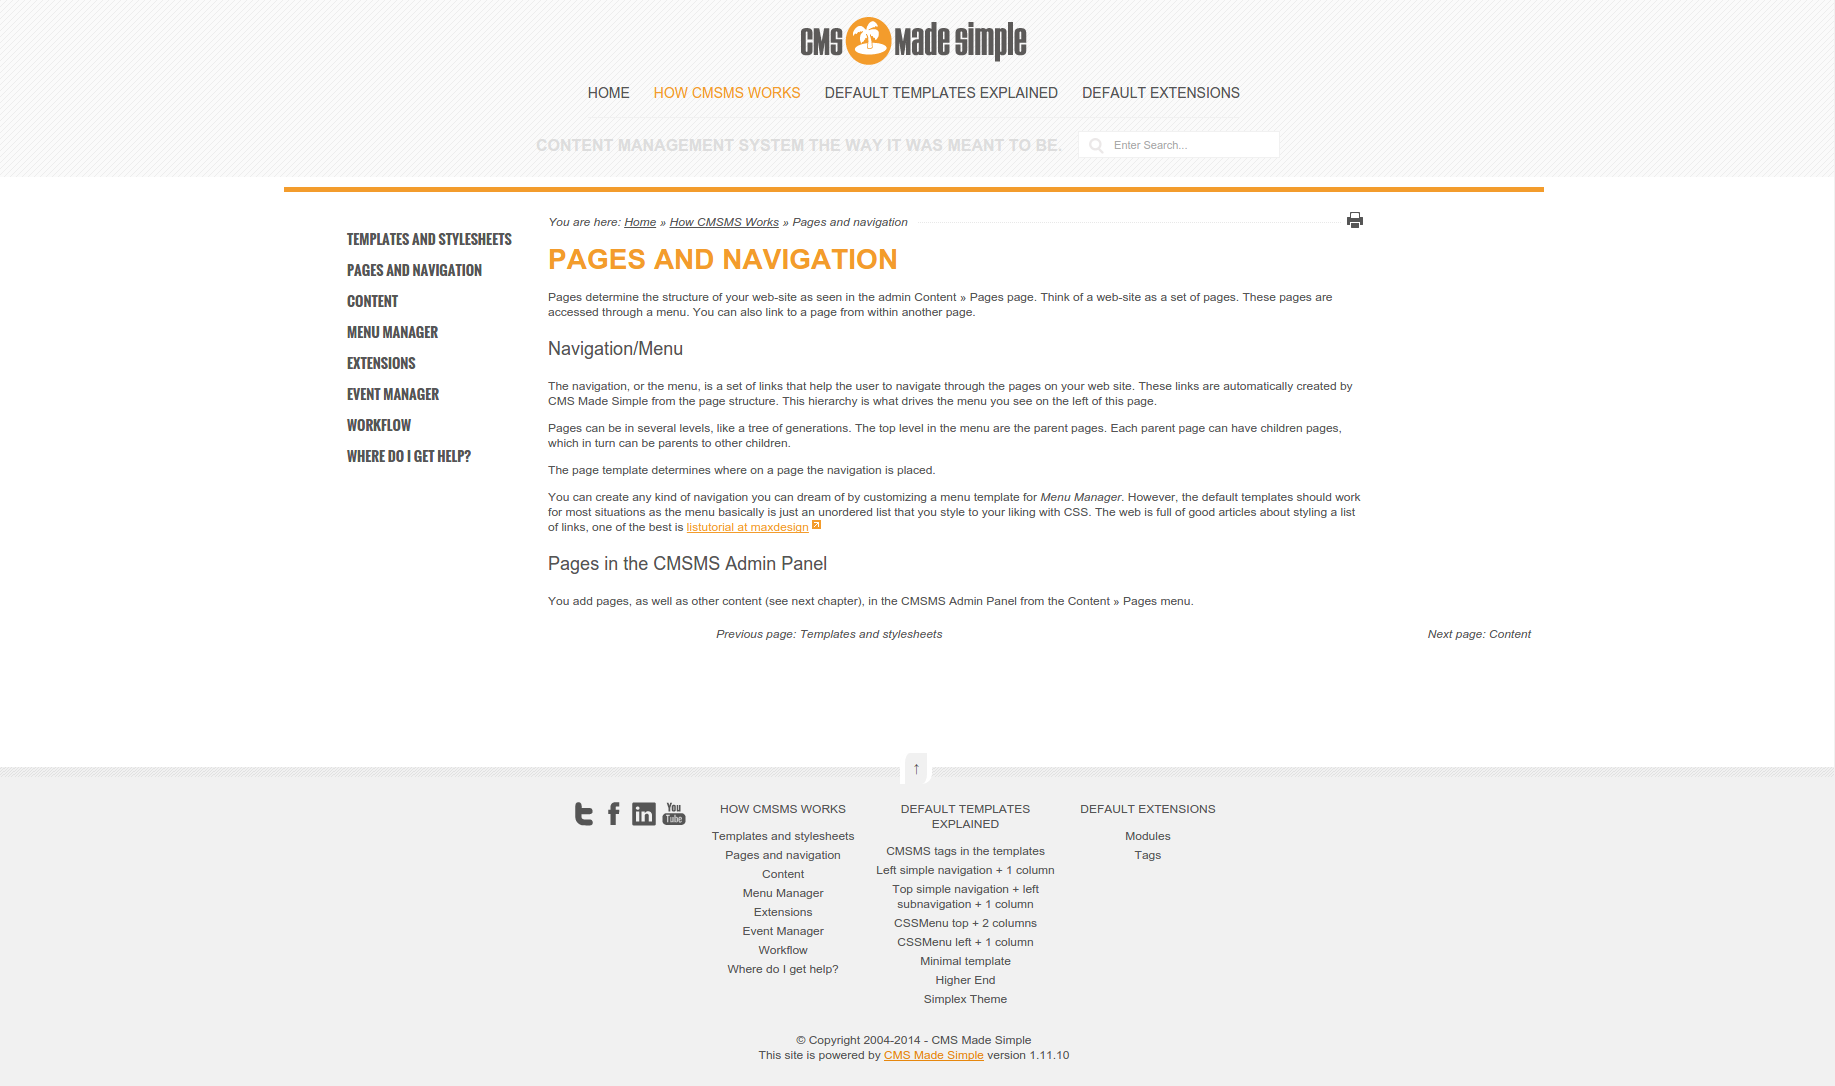
This Davelandia CMSMS theme is available to download it is a development of the CMS made simple Simplex theme. It is responsive (changes to suit different browser widths and different devices) has a sticky footer (the footer stays at the bottom regardless of page content) and is full width (content is centered and page extends full width, i.e. there is no obvious square page layout). There is a home page template with a left column that contains news and a page layout template that has a secondary side menu in the left column. The theme is installed on the davelandia website

Screenshot of Davelandia CMSMS template home page Screenshot of Davelandia CMSMS template content page
Screenshot showing home and content page views of the Davelandia CMSMS theme.

Click to download the Davelandia theme

If the theme was useful for you website and want to support development please consider sharing this page or website home page (ie from the Twitter, Facebook etc from links at the side of the page).

If you like the social toolbar then here is a guide to how to implement the floating social toolbar for your website.